How to Use HCDU Plus

For Beginners!

If there’s one tool I think every simmer should know how to use, it is HCDU+ by PickNMix sims.

This tool is so useful in so many different ways. You can use it to find conflicts between basically anything – CC objects that share a GUID (identification number) and therefore conflict, CC objects that are accidentally overriding Maxis objects…

And most importantly, you can use it to search for conflicts between Sims 2 Mods. HCDU+ allows you to see your current load order, which mods are conflicting and which particular resource is conflicting, and it allows you to mark conflicts as “known” which can tell the program “it’s okay, this is an intended conflict because this is a compatibility patch for these mods” or something like that.

You do not have to be a modder in order to use HCDU+ (although it is super helpful for modders of course!), you do not have to understand how to use SimPE, you do not have to be skilled in reading error logs.

But if you are a player who downloads a lot of Sims 2 mods, it is worth having a basic understanding of this program so you can get your game running cleanly and smoothly.

Oh, and for me Linux-user friends, YES you can absolutely run this tool on Linux via Lutris!

William at PickNMix Sims is my modding Sensei and has made some AMAZING tools and plugins for The Sims 2! Check out his whole site if you haven't.

So firstly, when you download HCDU+ you may need to configure the tool to locate your Sims 2 game and your Downloads folder (especially on Linux).

For more information about setting up sim-tilities such as this one on Linux, please see this page!

To configure HCDU+ go to File…/Configuration, and make sure the two file paths are set correctly. Note that if you aren’t sure what exactly the program is looking for, you can hover over the ? icons for a helpful tooltip.

Once this is set correctly, you can scan your folders for conflicts. You do not need to scan your entire Downloads folder, and you do not necessarily need to scan for all conflicts.

You can choose a particular folder to scan, and the program will then locate conflicts between only the files inside that folder.

Under the “Resources” menu you can see a lot of different options that may be selected or unselected. These are all resources that can be found within a sims2.package file and explored within SimPE.

These options will probably be gobbledygook to most players, and that’s okay. Modders may find this menu more helpful. For everyday mod conflict finding, make sure you have at least Bcon, Bhav, Objd, Objf, Str, Ttab and Ttas selected.

I recommend unselecting UI especially if you have a clean UI mod installed, otherwise the program will give a bunch of alerts about UI overrides which can be ignored.

Under the ‘Conflicts’ menu you can select to check for GUID conflicts between CC items, and to allow the program to check for GUID conflicts with Maxis items or not.

A “GUID” refers to an object’s unique identification code. This code is how the game knows which object it is generating. A default replacement for an object will always intentionally override the GUID, because a default replacement is taking that identification code and applying it to a different object – e.g. no, instead of finding THAT food mesh and info, find THIS one instead please!

However, sometimes overriding Maxis GUIDs is unintentional. When this happens you may have an object that doesn’t respond when you click on it in the catalogue, or doesn’t appear at all. You can use HCDU+ to find which object is overriding it.

To do this, in the “Resources” menu you would select only “Objd”, because that is the part of the package file that contains the GUID. Then in the “Conflicts” menu, you’d select “Check for GUID conflicts” and un-select “ignore Maxis GUID conflicts” so that HCDU+ can find anything that’s overriding a Maxis GUID. You’ll then get a nice big list of any mods or otherwise that contain an override of an object’s OBJD file, and then check for anything that mentions the name of your problem object.

For intended conflicts (such as default replacements or mod overrides) you can right-click a result and select “Add to Known Conflicts”, which can then be ignored by the program on the next scan. (Under the “Conflicts” menu, there is an option to either include known conflicts or not, which is how you can control that. You can also view all known conflicts within that menu!)

Sometimes, CC objects also conflict with other CC objects. Whichever object is loading last (more below) is the object you will see in your catalogue.

To fix a GUID conflict, open one of the packages that shares a GUID with another object. Locate and open the OBJD file with the conflicting GUID as highlighted by HCDU+.

Go to Tools / Object Tools / Hash Generator and check if the CRC 24 Hash Value is different to the current GUID. If it is, copy the value and paste it into the GUID entry box. You will likely need to check the “update all MMATs” box, commit and save.

**Disclaimer: this is a very brief and generic tutorial. If your object stops working in any way, seek extra information and help on GUIDs**

The main thing I use HCDU+ for is finding and managing conflicts between mods.

So firstly, let’s talk a little bit about mod conflicts.

A mod will conflict with another mod when they are both trying to edit the same Maxis resource. As we just learned, resources are the piece-meal parts that make up a “package” file in The Sims 2. Some mod conflicts are resolvable by clever modding and compatibility patching, some conflicts are not and occasionally you will have to choose between 2 mods that both override the same Maxis resource and cannot be used together.

When two (or more) mods conflict, the mod that is loading last will be the mod that “wins”.

The game scans files alphabetically and in the following order:

First: It’s own core game files inside Program Files

Second: Overrides inside Program Files, e.g. in [Latest EP]/res/catalogue/bins

Third: Your Downloads folder

  • Individual files in the root Downloads folder
  • The first folder alphabetically within the root Downloads folder
  • All of the files and then folders within that first folder
  • Once done, back to the root Downloads folder and onto the next alphabetical folder
  •  

(Have I confused you yet? See screenshots for visuals!)

When a modder creates a “compatibility patch” between 2 mods, what they are usually doing is intertwining various changes made to a Maxis resource and combining them into one file that must load last in order to win.

HCDU+ shows you which mod is loading last when conflicting, which is extremely helpful. And if you hover your mouse over one of the resources, you can also see exactly which resource is conflicting.

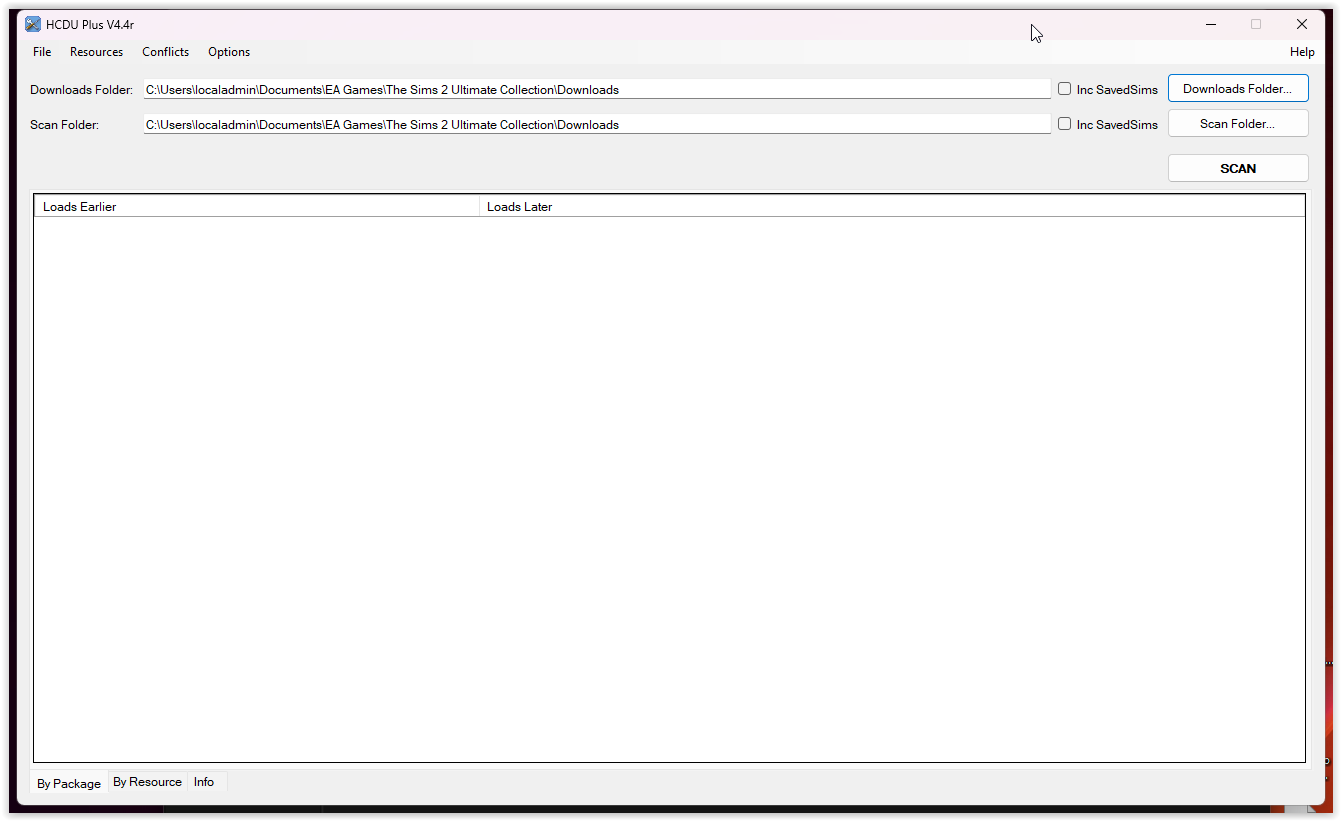
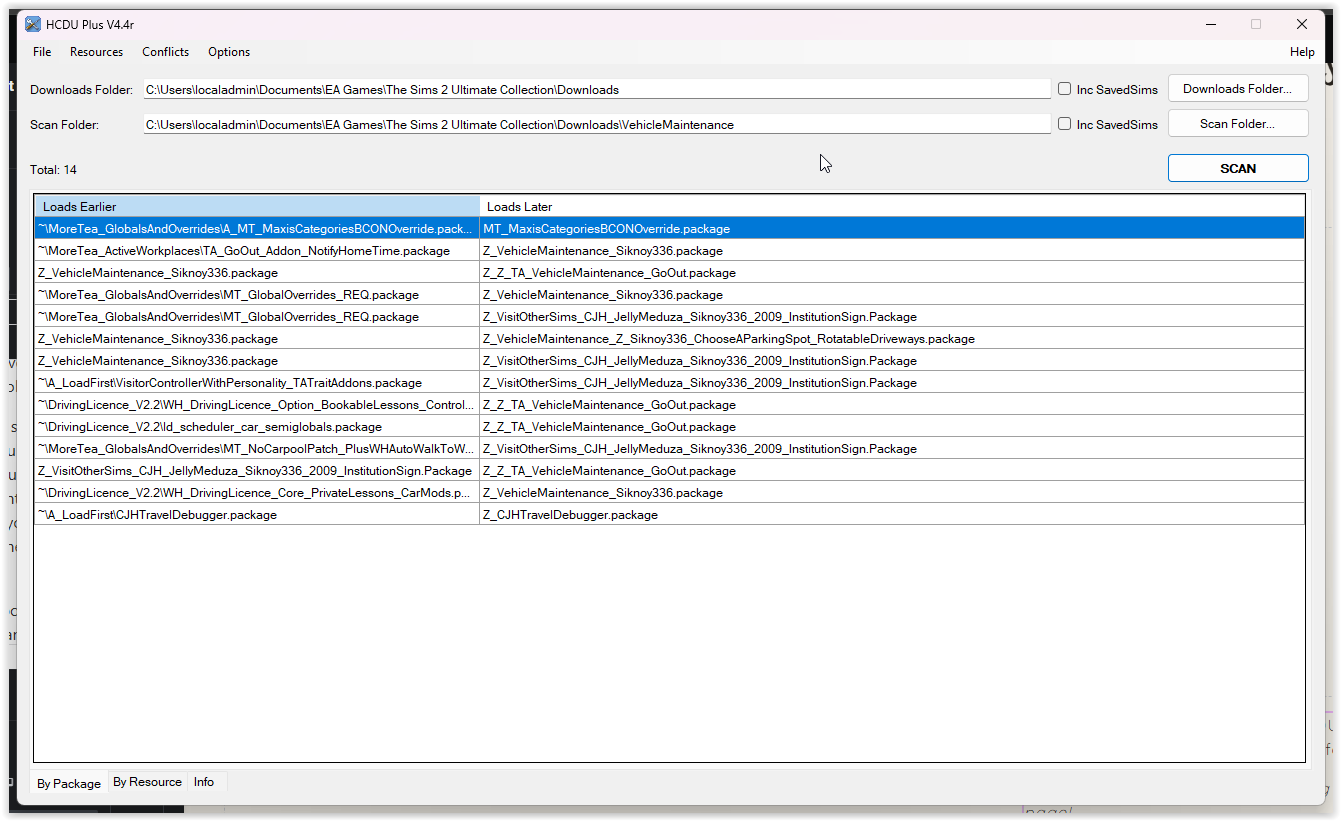
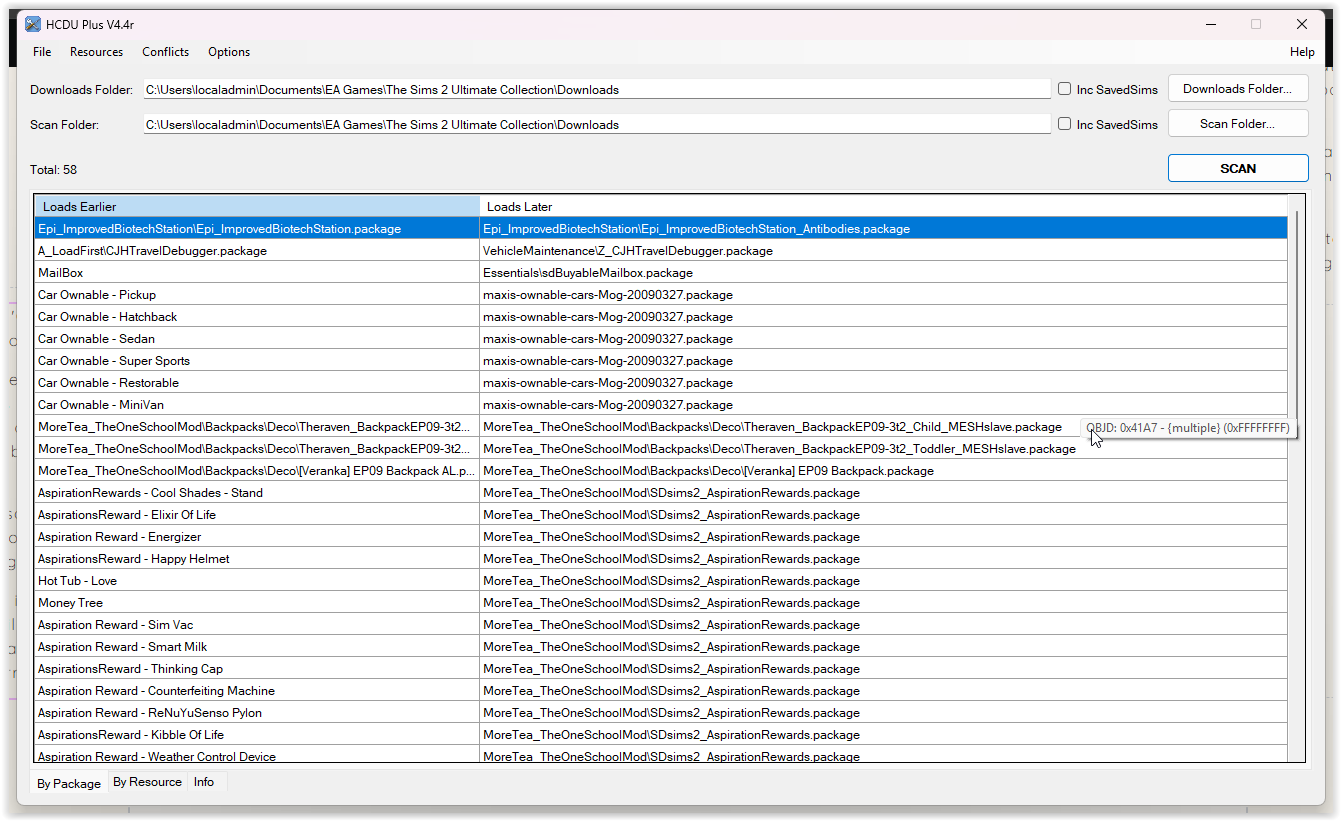
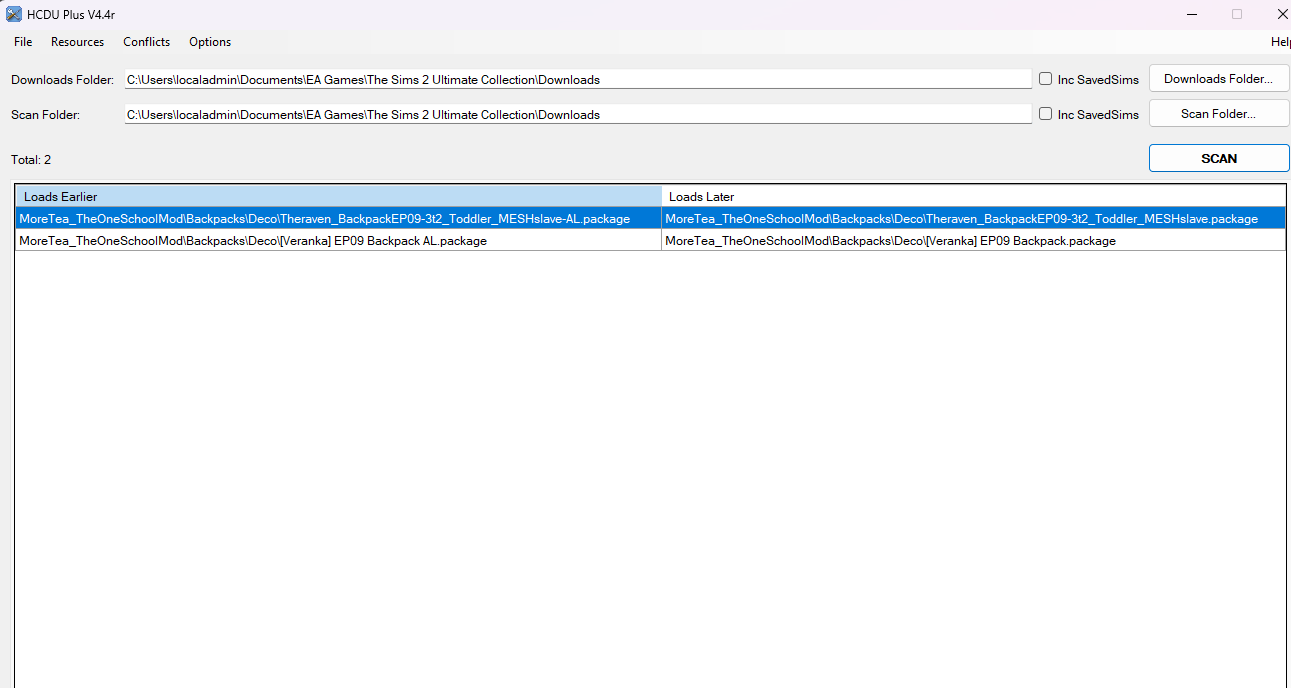
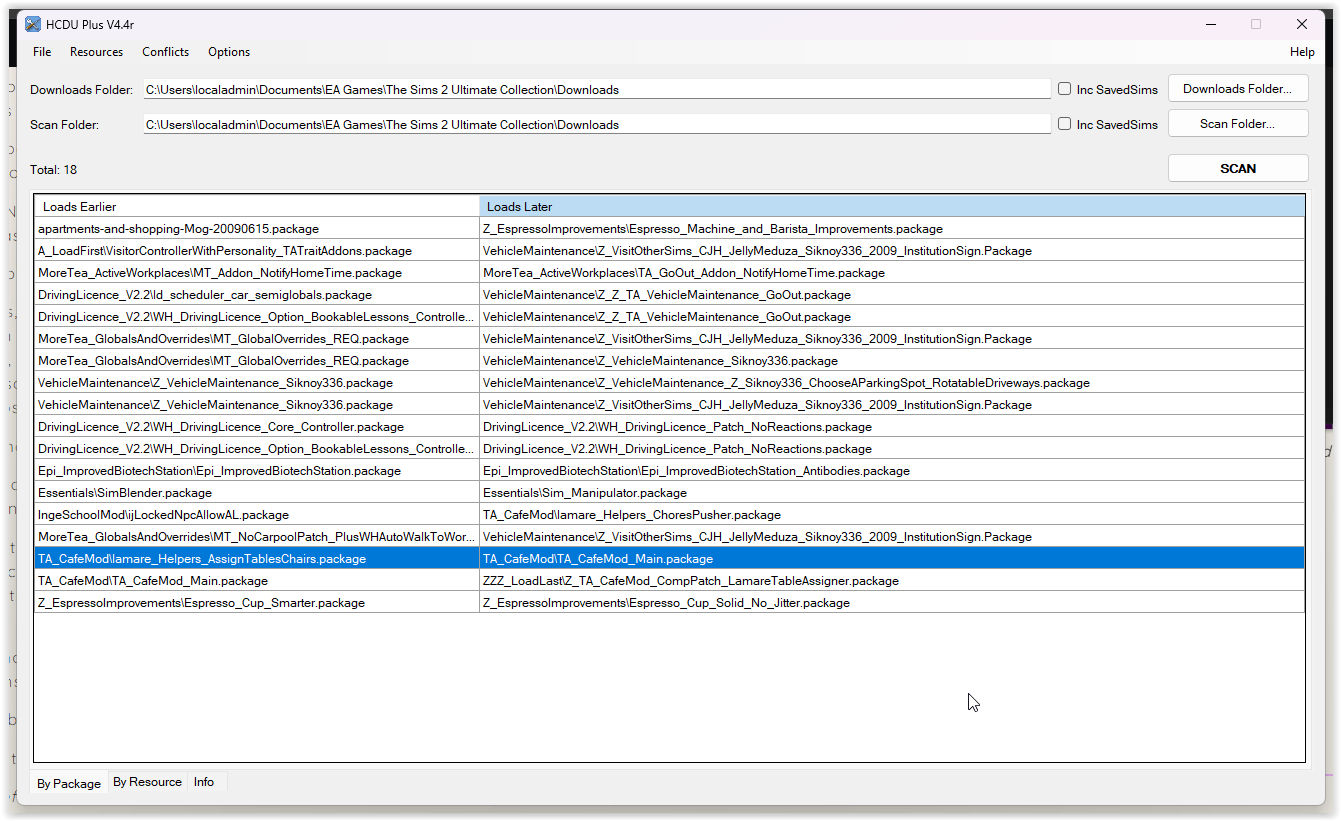
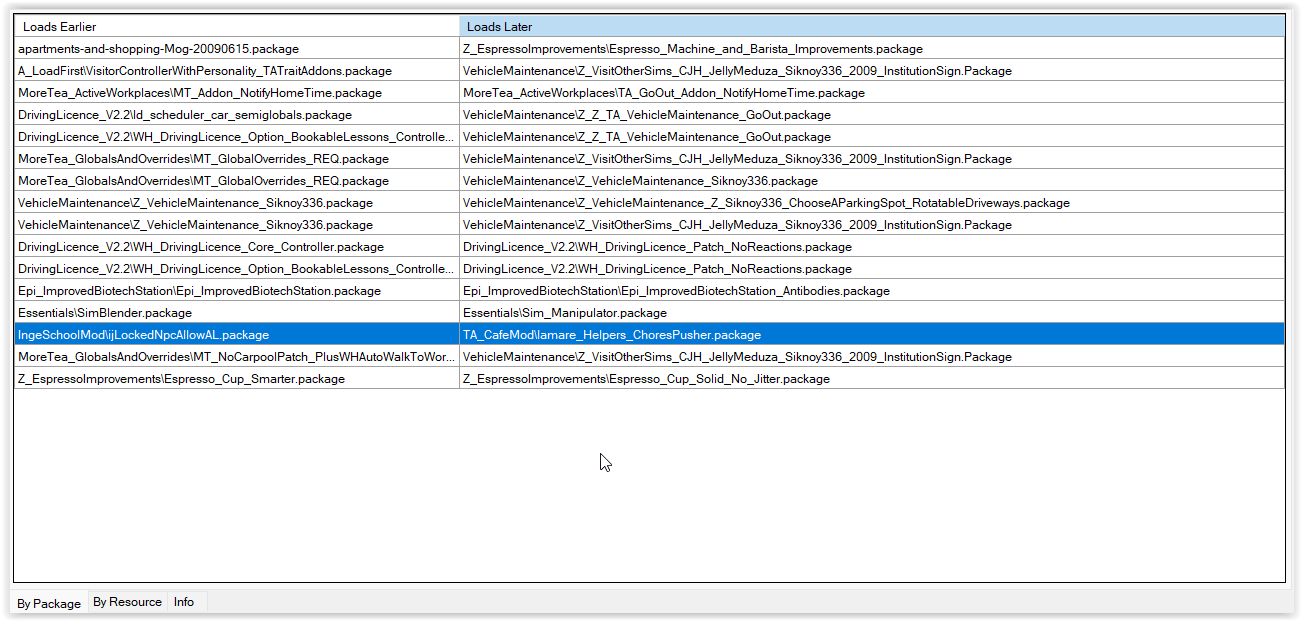
When you download and install mods into your game, I always recommend running HCDU+ to see if it is conflicting with anything you already have.

If it does, you can check if the mod page includes instructions for conflicts. Sometimes a mod will say, “known to conflict with otherModX – load mine last and it will work”. In that case, you want to place the new mod into your Downloads folder in such a way that it will load after the conflicting mod. Otherwise the mod author may tell you to remove the old mod as it’s no longer needed.

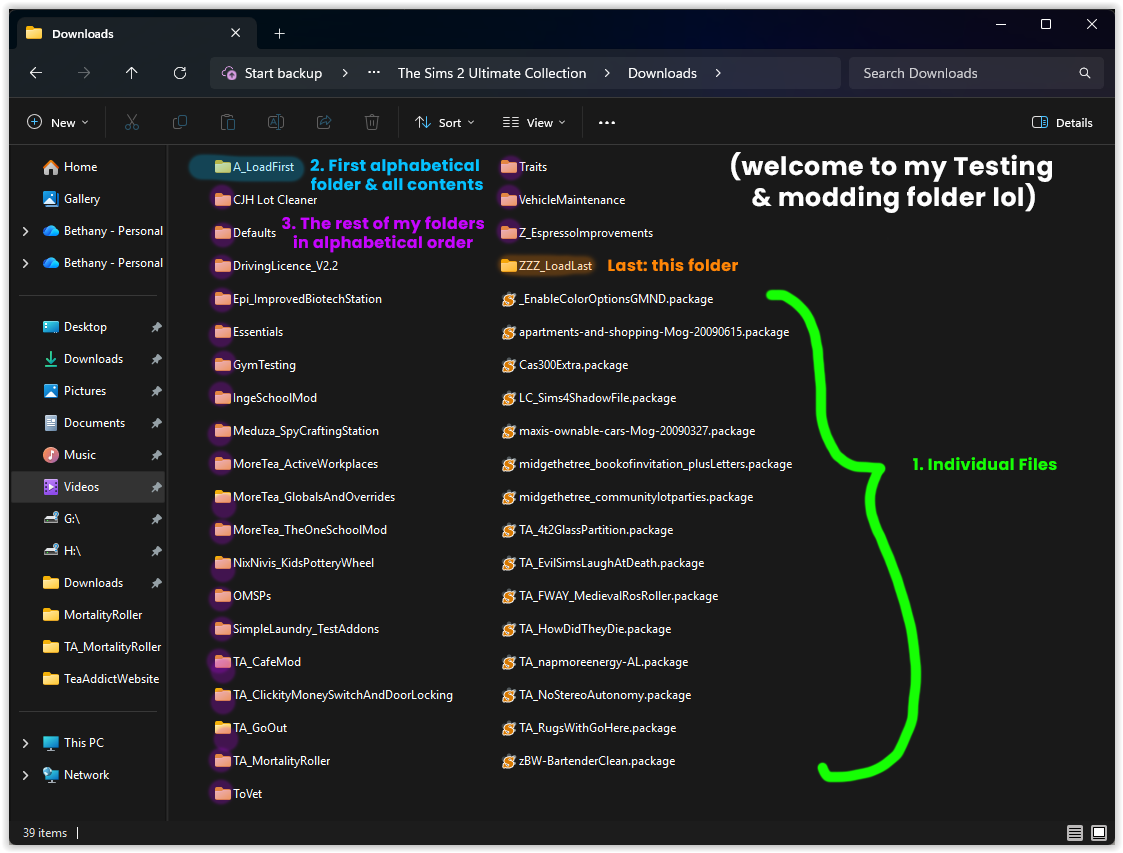
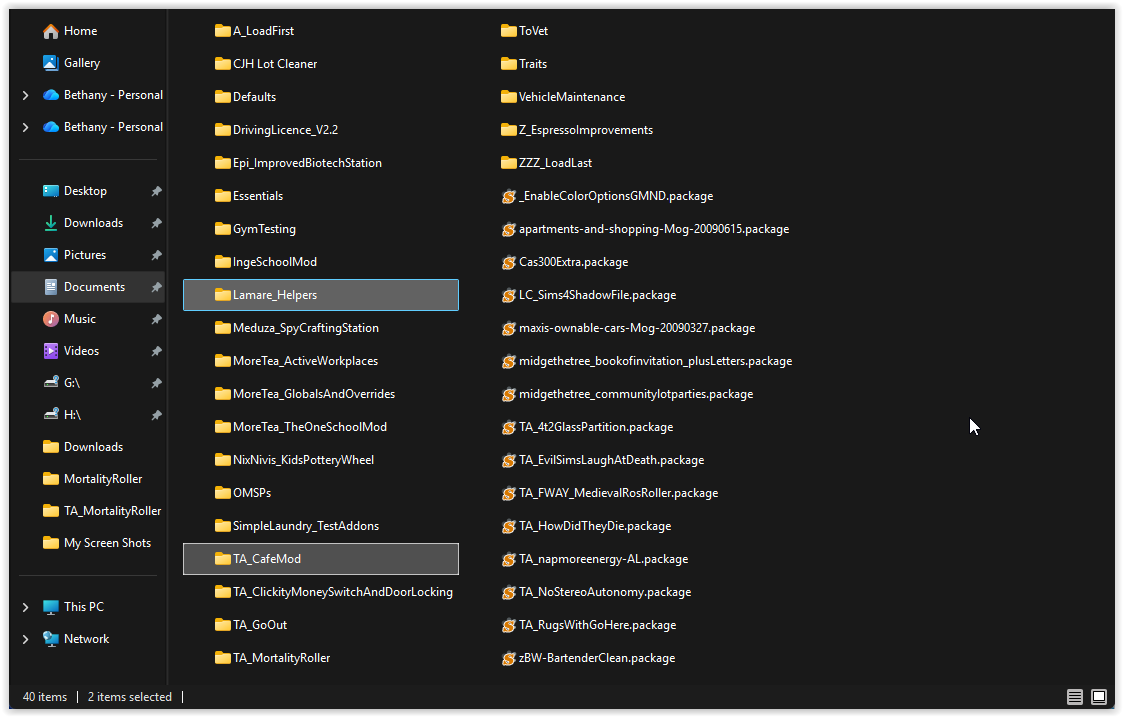
Let’s call your new mod “NewMod” and the conflicting mod “OldMod”. You can organise these mods by either:

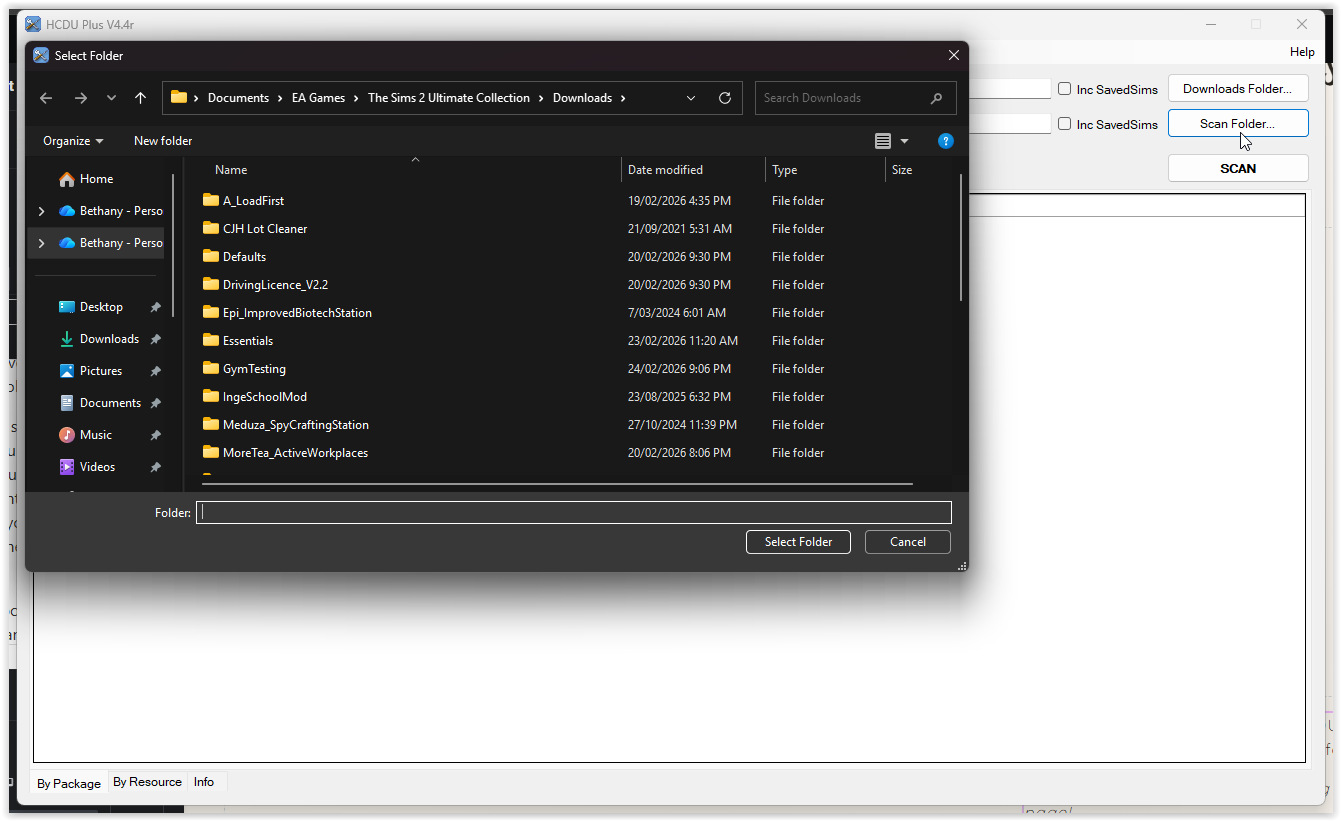
a) Putting both NewMod and OldMod in the same folder with a Z_ at the beginning of the file name so it will load last, like Z_NewMod for example, or

b) Putting NewMod in a different folder that will load last, called something like ZZ_LoadLast.

I use both of these methods in my own folder depending on the mods.

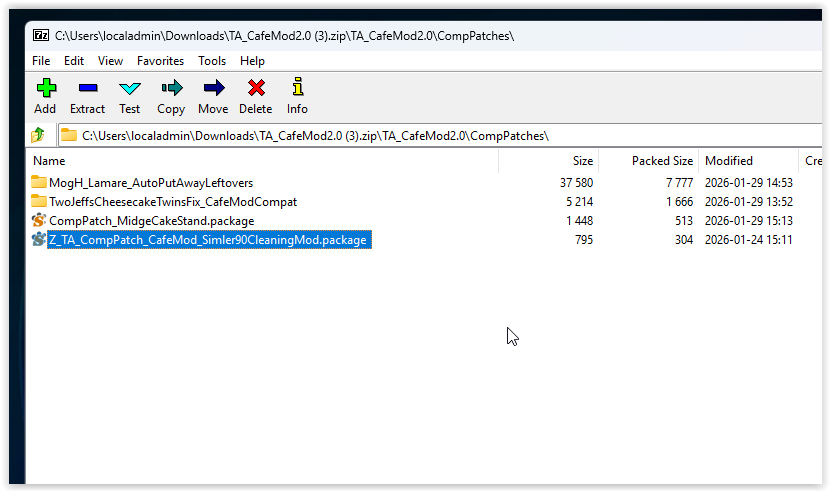
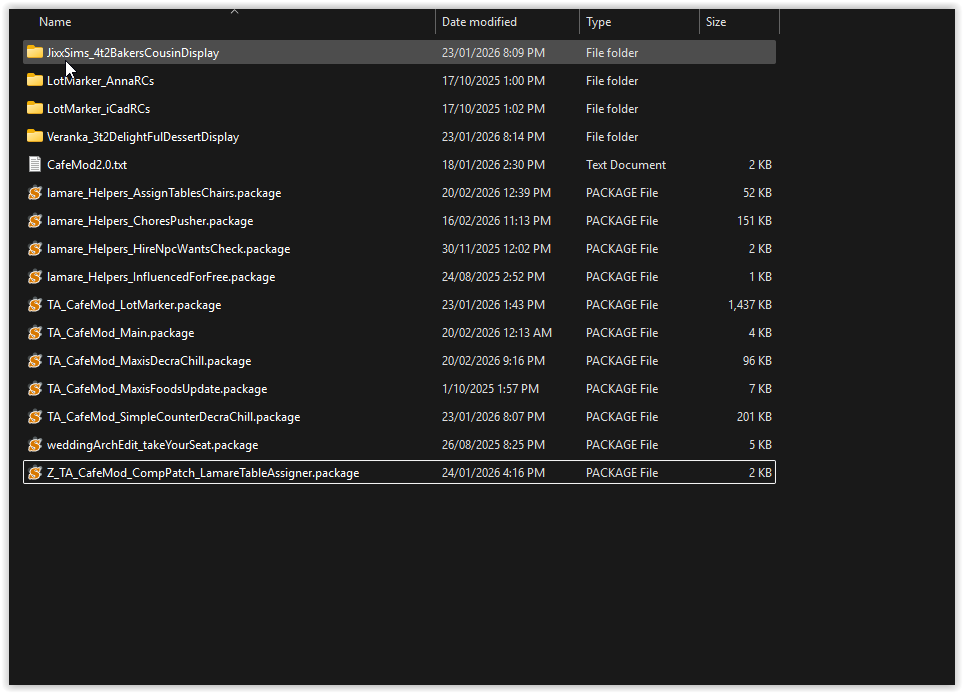
Other times, a modder may include compatibility patches that may resolve your issue. If so, you can place them in your folder in a way that they will load last alphabetically. Most of the time, modders will label a compatibility patch with a Z_ or a ZZ_ at the start of the file name, so that it will be read last. This is intentional and it’s important that you don’t remove those Z’s unless you understand what you’re doing.

Let’s pretend we have a comp patch called Z_CompPatch_NewMod_OldMod.

Again, you can either put the compatibility patch within the same folder as both mods, making sure it loads last, or put it into a folder called ZZ_LoadLast.

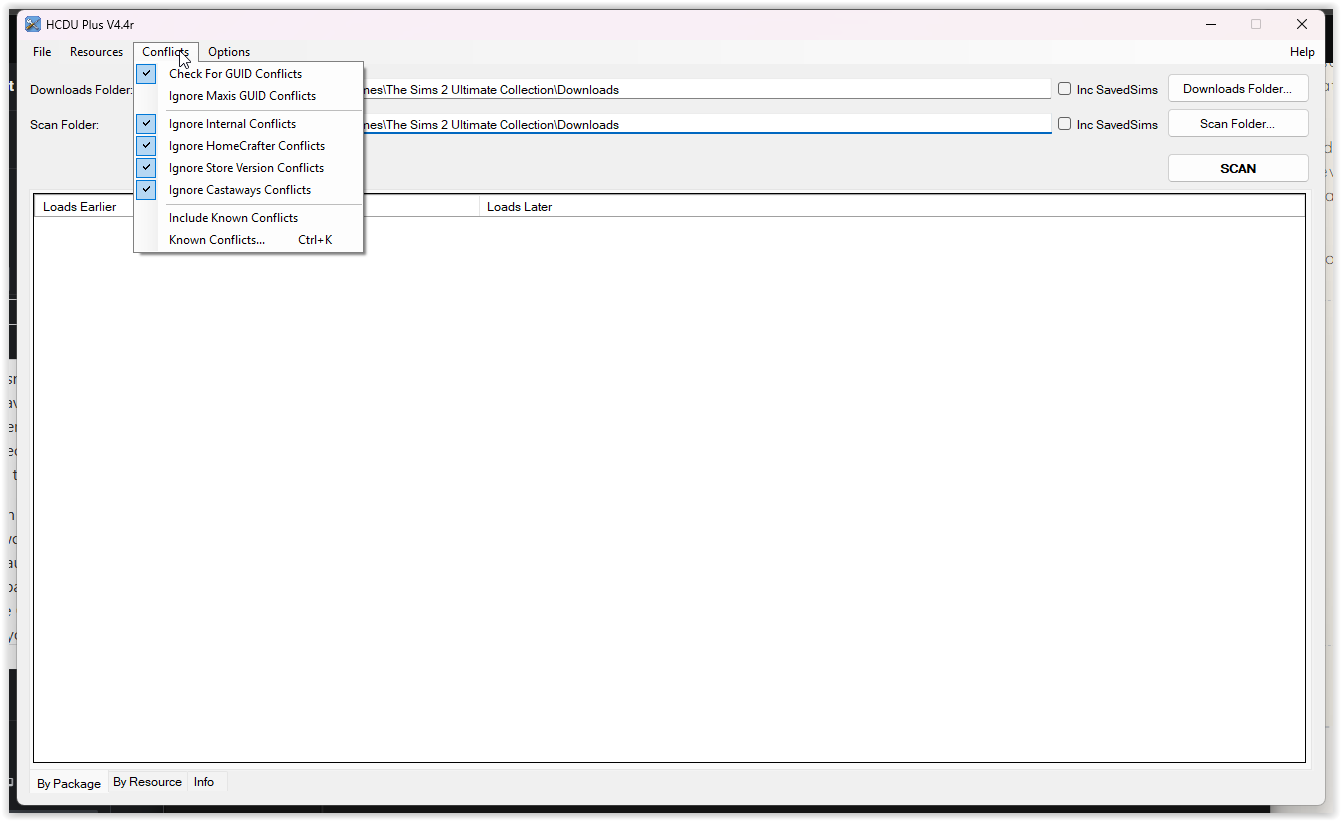
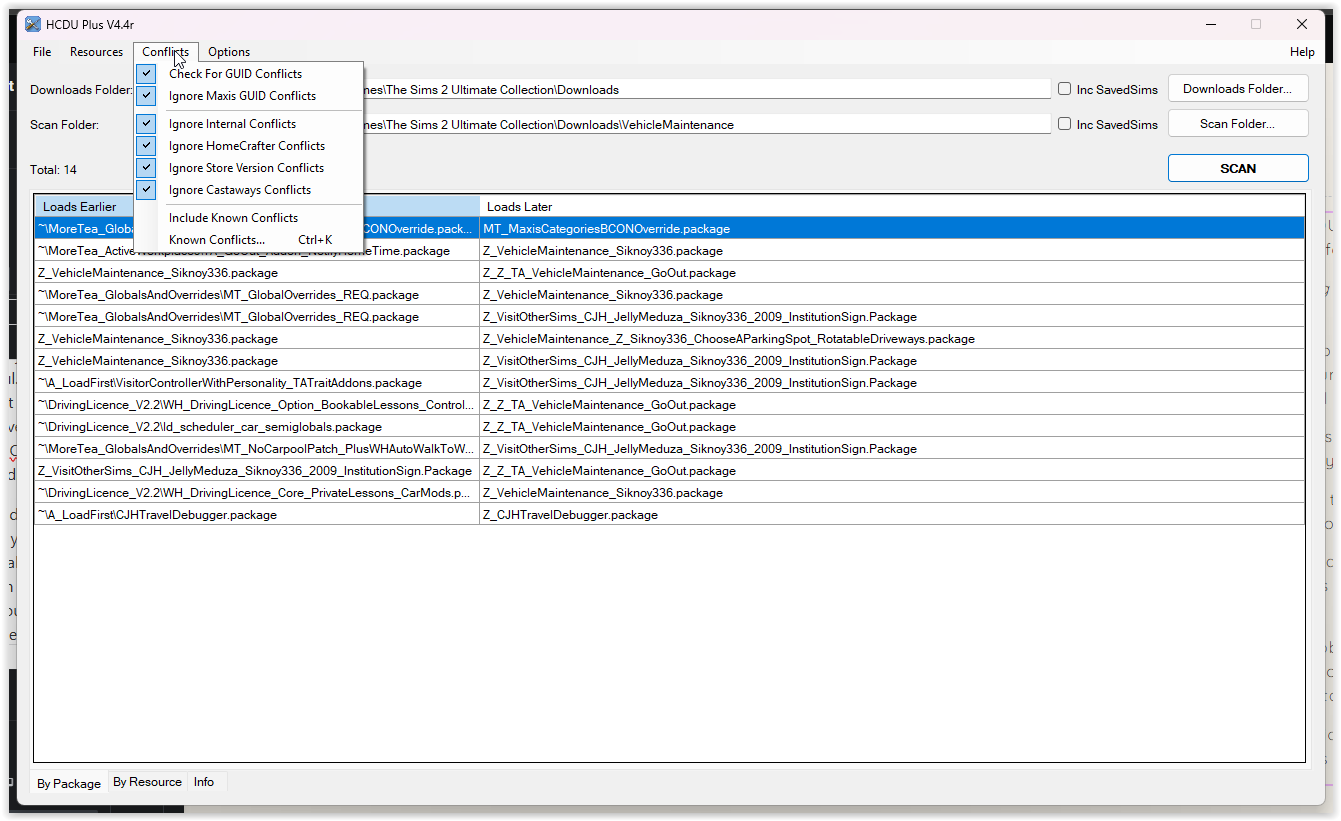
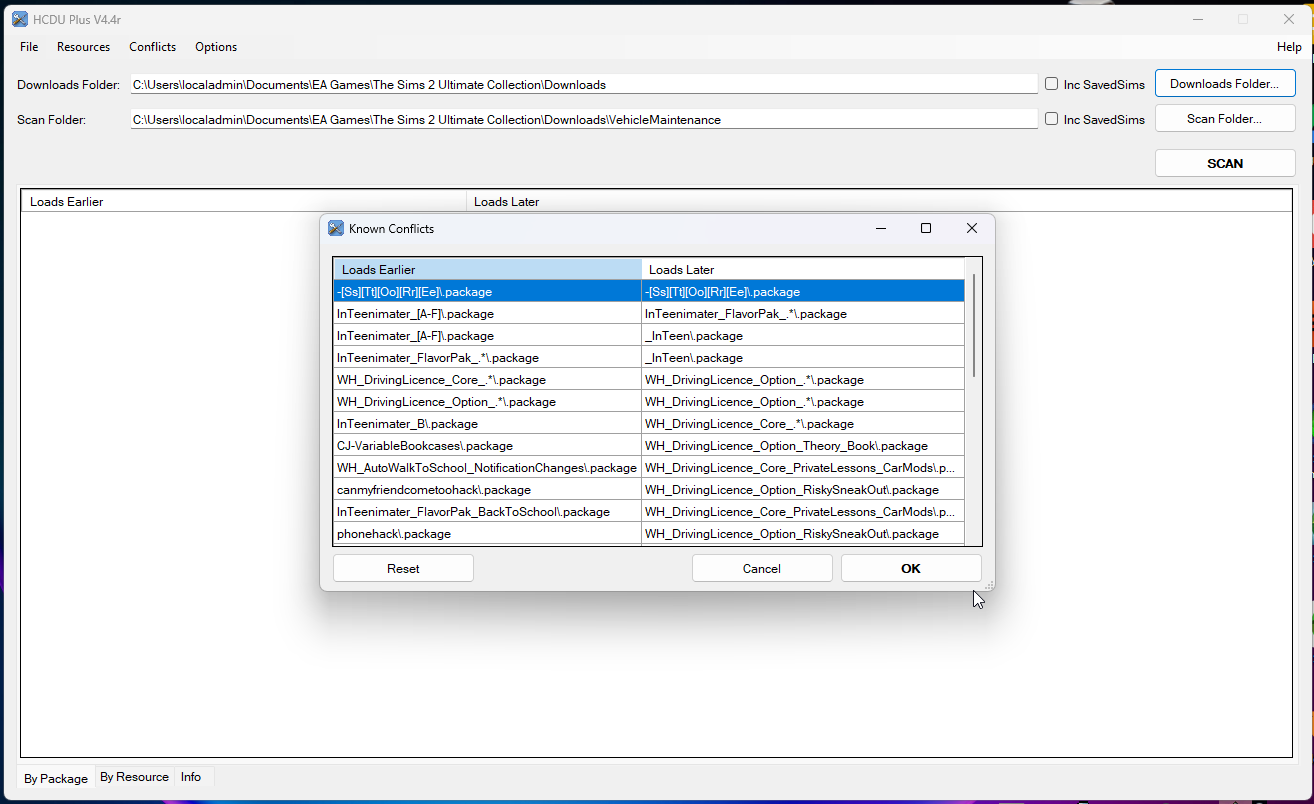
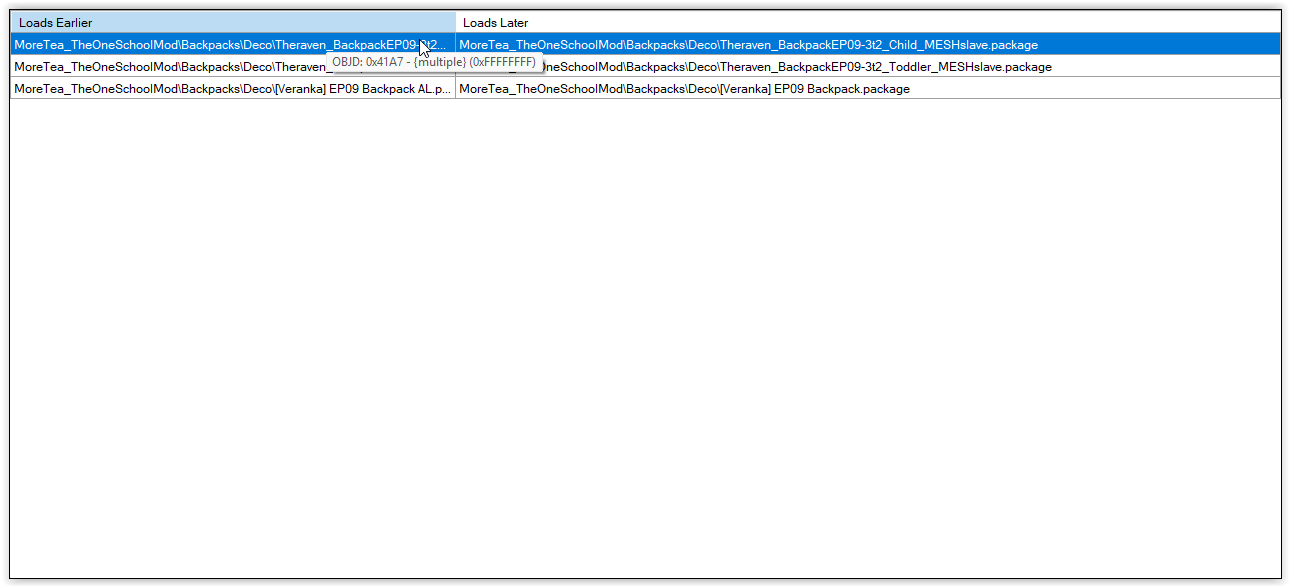
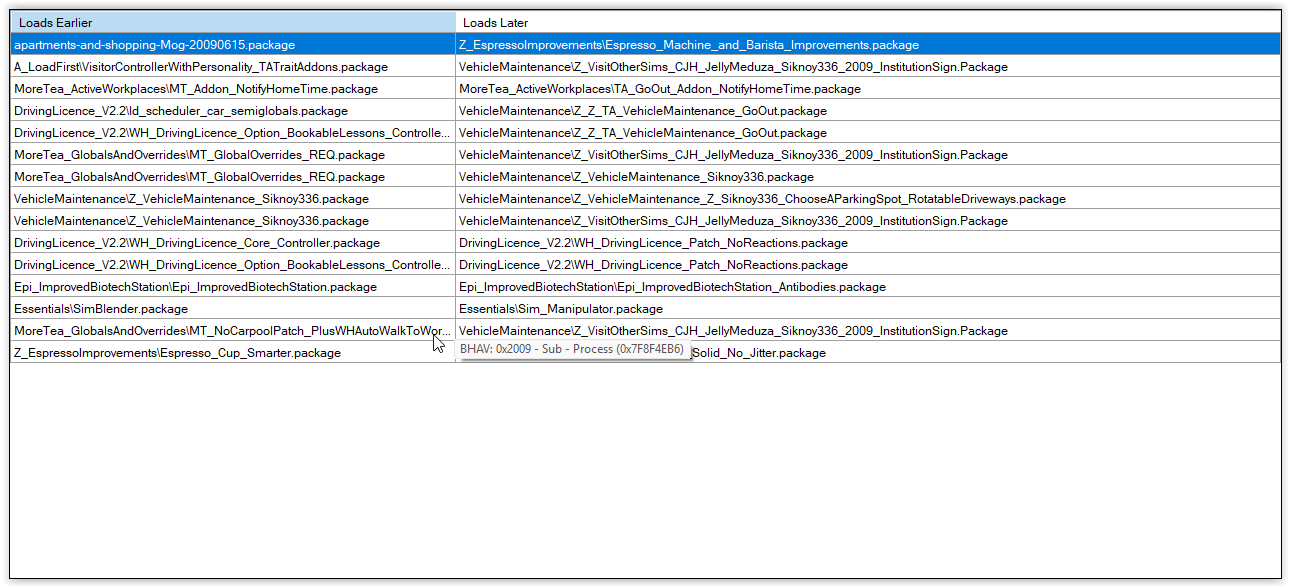
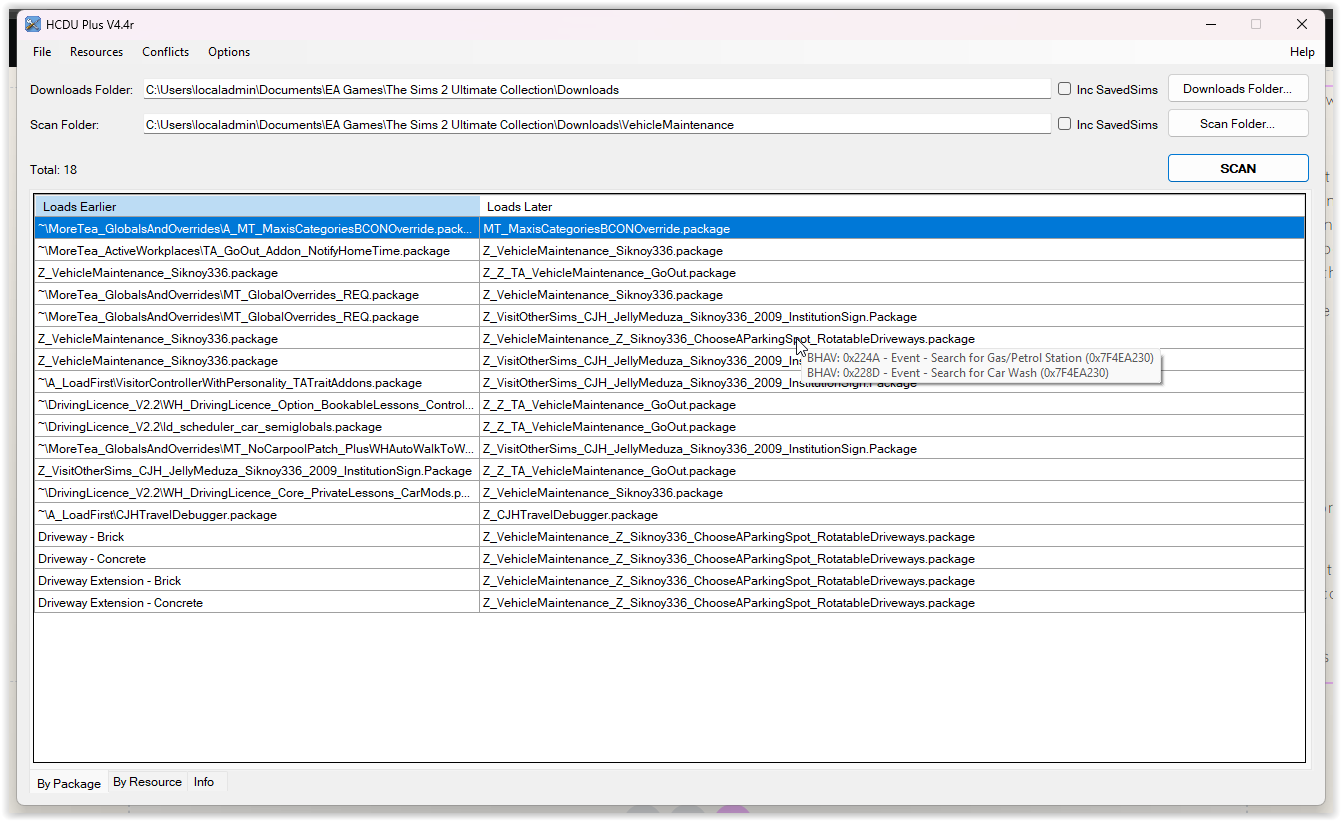
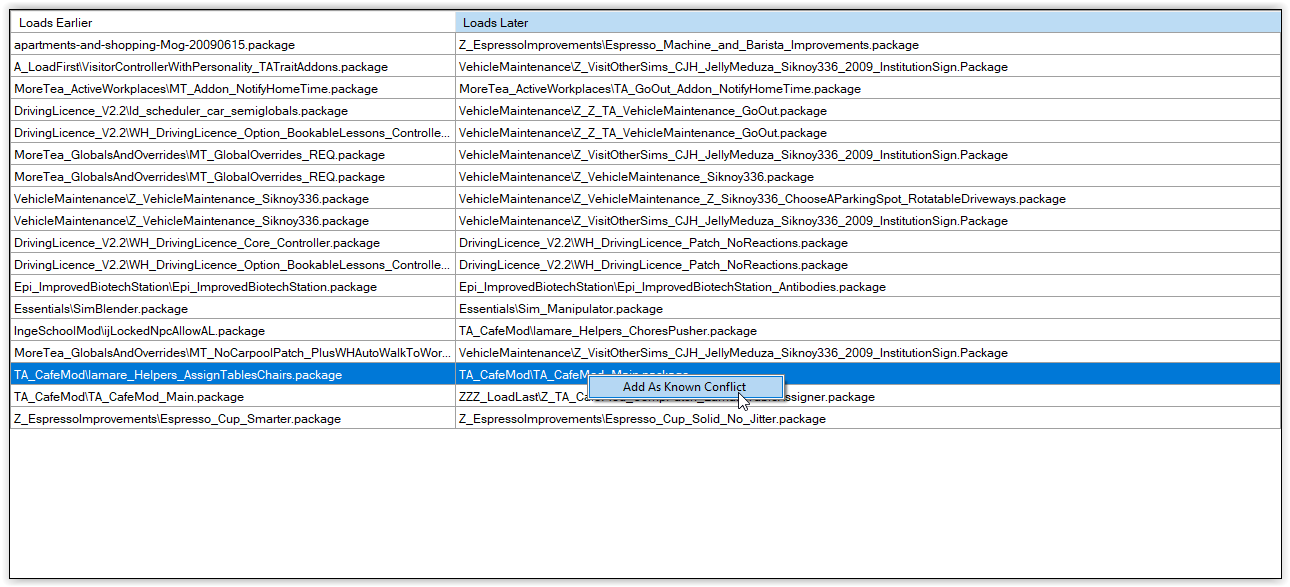
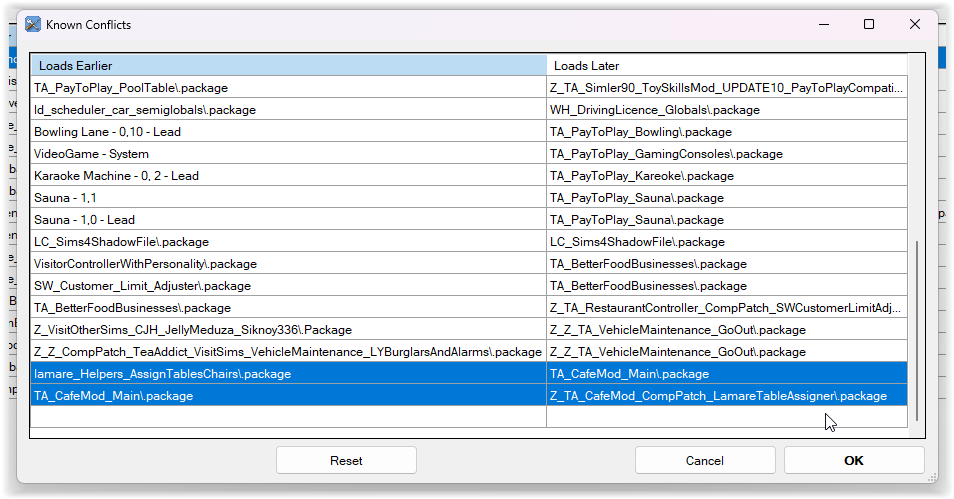
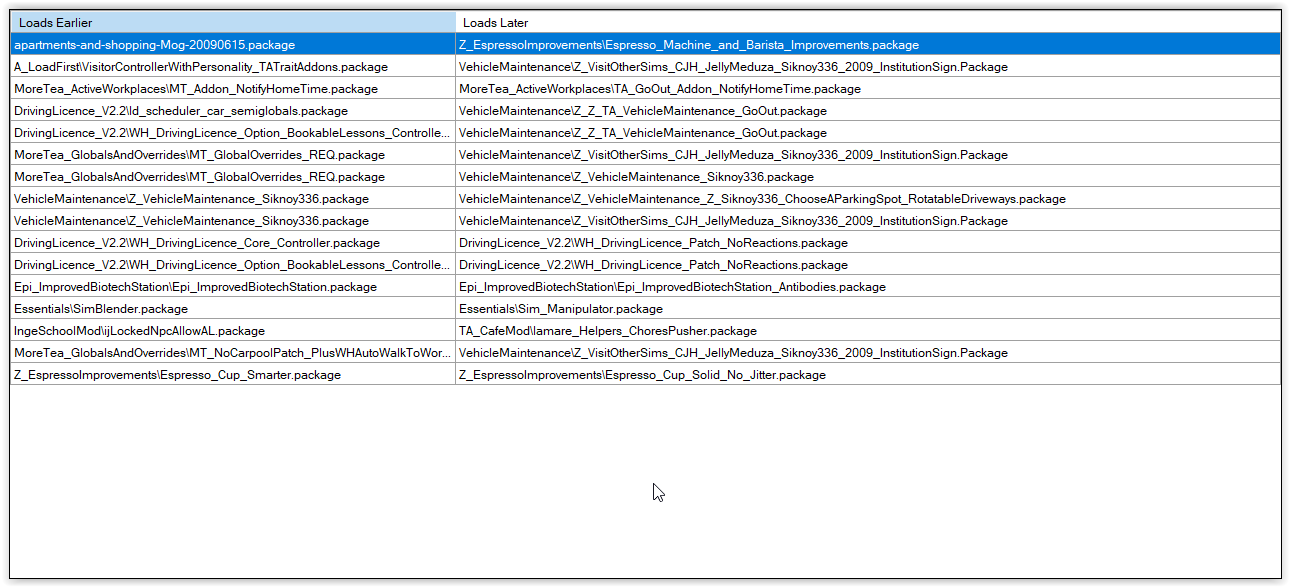
The compatibility patch will likely show up in HCDU+ as a conflict with both NewMod and OldMod because in all cases the same resource is being overridden. As long as the compatibility patch is loading last, which you can double check with HCDU+, you can add all of those conflicts to your “Known Conflicts” list and move on!

If there is no convenient compatibility patch to make your conflicting mods work together your options are:

a) Choose between NewMod and OldMod, or

b) Contact the mod author and request a compatibility patch.

If it’s one of my mods, contact me. I am passionate about providing compatibility whenever I can!

Slow and Methodical Wins The Race...

While I know this is not what many of us want to hear, the best approach to building a Sims 2 mods folder is to go slowly and carefully, checking in regularly with HCDU+ and managing conflicts as you go. There’s nothing more overwhelming than loading up HCDU+ for the first time and seeing hundreds of conflicts listed, without having a clue where to start.

If this is you, I recommend starting with smaller sections of your folder, like CAS content, or only Mods, or only some specific mods, and working out which conflicts matter and which ones don’t. It’s definitely worth it to have a game which runs smoothly, with mods working as intended and no errors popping up while you’re trying to play!

If you have more questions about HCDU+ you can check in with me on Discord or Tumblr. But hopefully, this was helpful x